Showing posts with label pattern. Show all posts

Tuesday, January 7, 2014

Doctor Who Along Block 17 A crack in time

Ah the space-time continuum.  Always something interesting going on there.  Where would we be without it? I'll leave this question to you to ponder.

While you are pondering, you can sew up the 17th block of the Doctor Who Along ~ A crack in time.
Download the pattern instructions here.


One note: There are a couple of errors on the numbering scheme in the pattern pieces. I'll get this fixed in a few days, but for now, follow the numbering on the piecing guide and you won't go astray.
Crack in the wall

Careful you don't get sucked in and end up in another dimension!


One note, you might actually need a bit more than a fat quarter of background fabric for this block.  Just a head's up so you don't run out.


Happy Sewing!


Tuesday, December 17, 2013

Doctor Who Along Block 16 Vashta Nerada

PLEASE NOTE – these patterns have been removed are no longer available
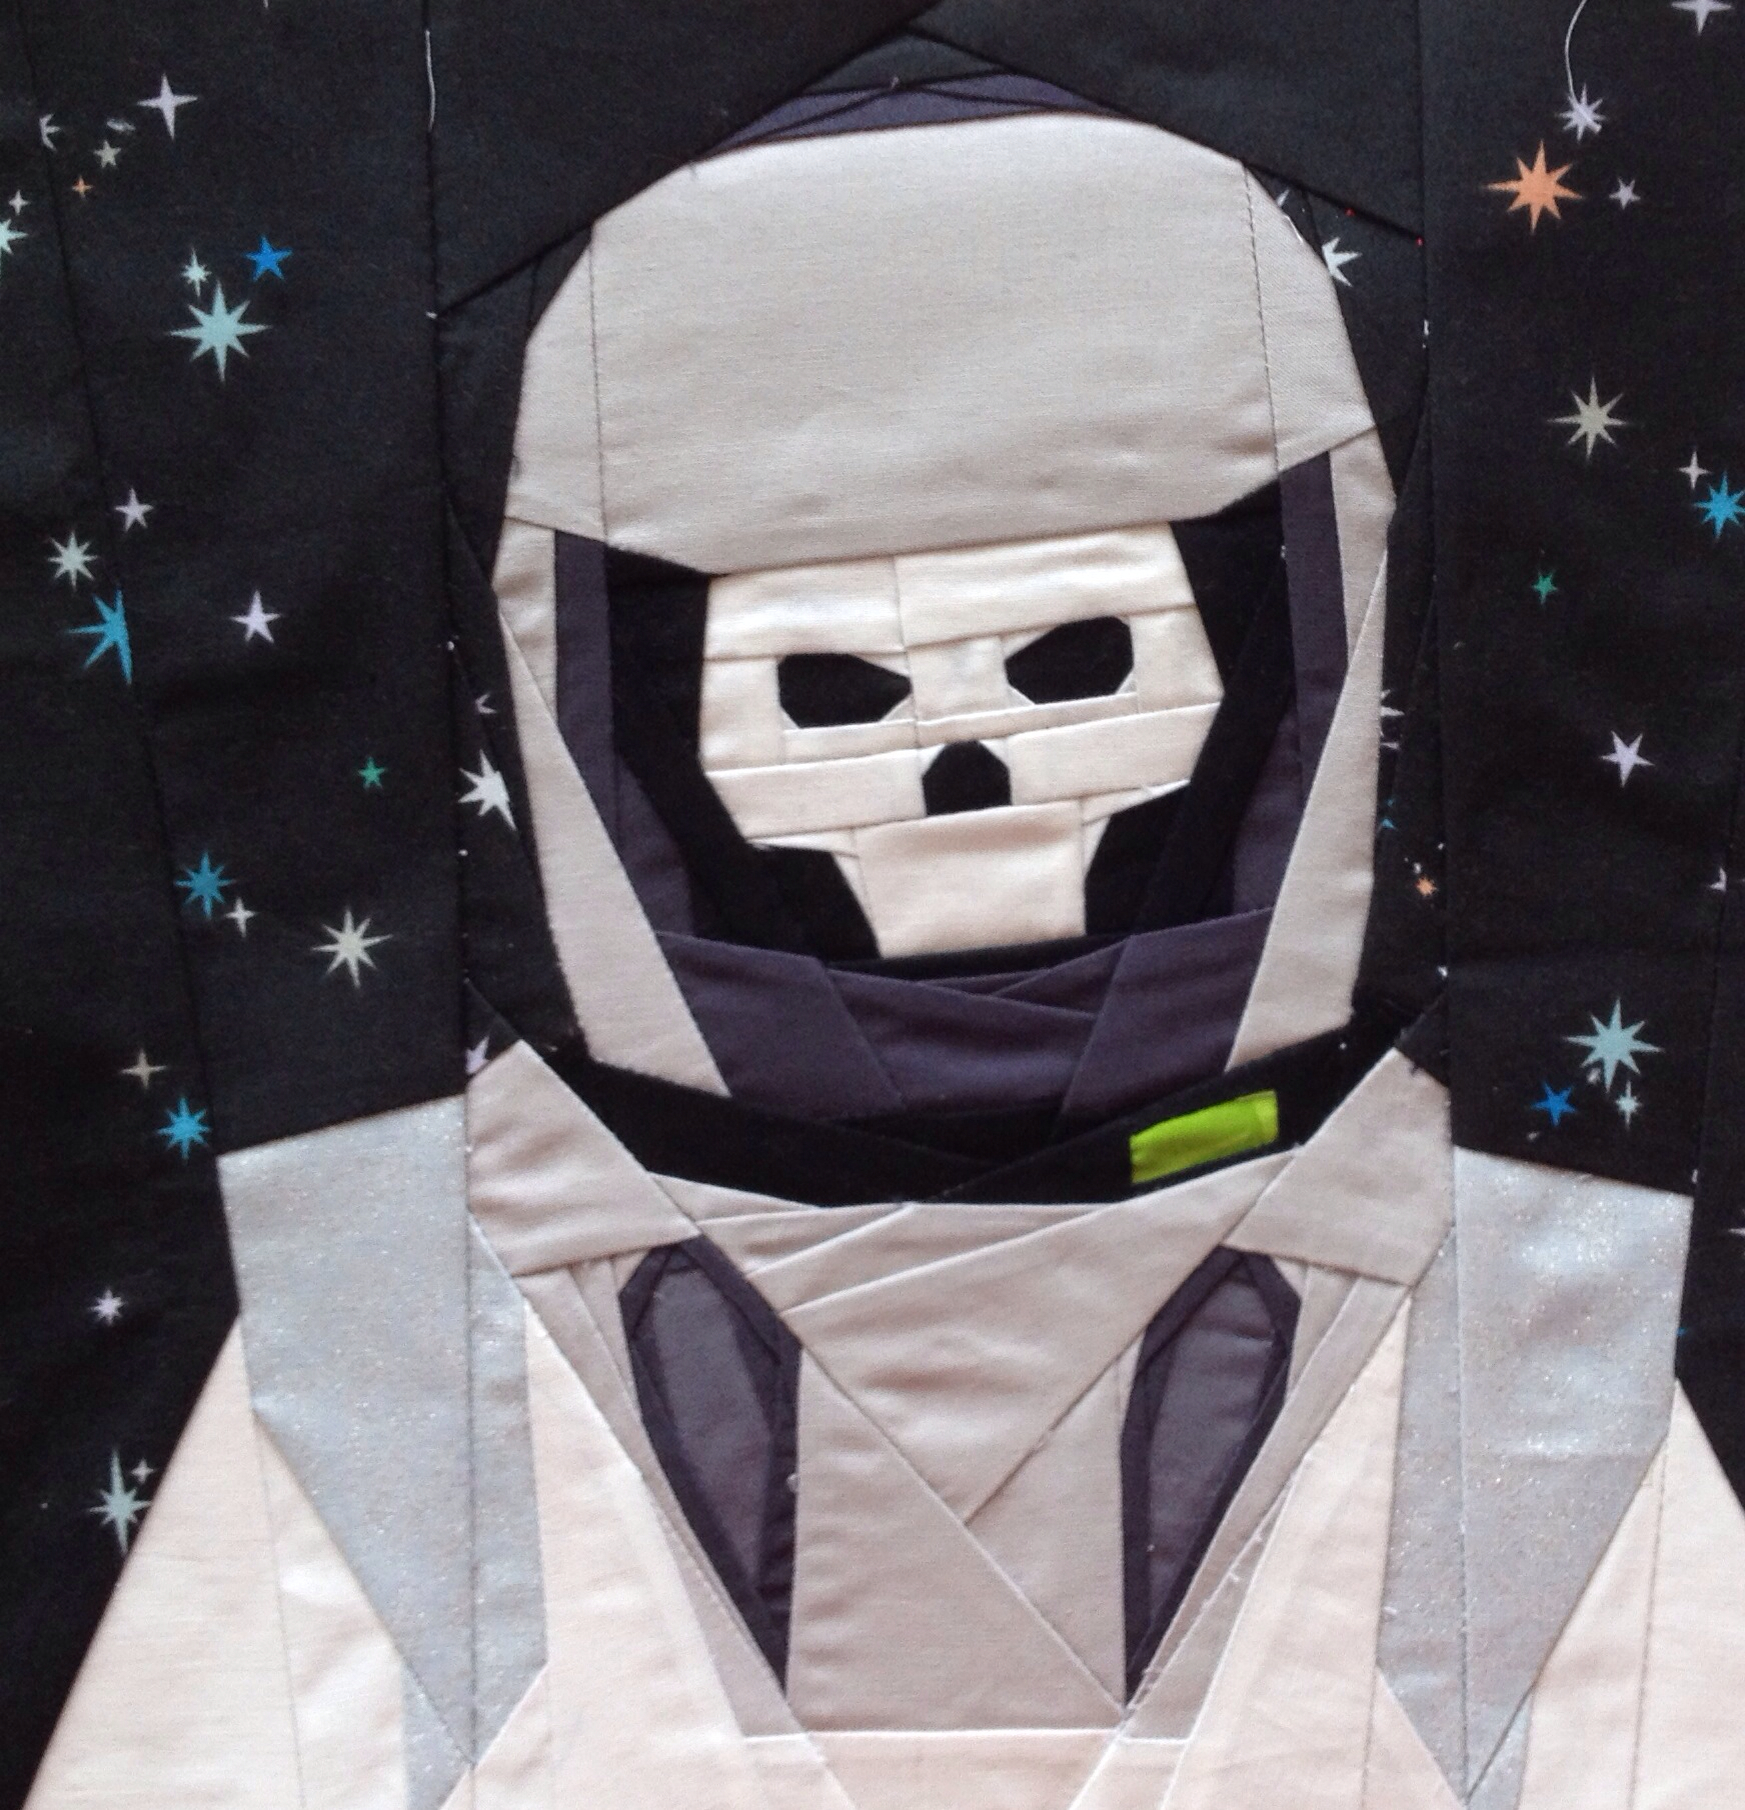
Ah yes! The library episode where we first get to meet River Song.  That was a creepy episode(s) ~ for me anyway.

Here is Doctor Who Along block 16 ~Vashta Nerada

image

Soma has designed her version to let you chose just how creepy (skully) you want to make it.
Download your pattern

Don't forget to post your finished block pics in the Flickr pool.

This is the last Doctor Who Block of the year. We will resume our Whovian sewing adventure in January.  In the meantime, I wish you all a happy holiday season and a happy new year!

Happy  Sewing!

Tuesday, December 3, 2013

Doctor Who Along block 15 River Song's diary

Welcome back Whovians!  Did everyone in the US have a nice thanksgiving weekend?

It's time for Block 15 of the Doctor Who Along.  I'm happy to say that this weeks block is one of the easiest of the quilt along.  Breathe a sigh of relief!

Download the pattern file here or on Craftsy.


Happy Sewing!


Tuesday, November 19, 2013

Doctor Who Along Block 14 - Hello Sweetie!

PLEASE NOTE – these patterns have been removed are no longer available

Can you believe we are already at block 14 of the Doctor Who Along? I can't.  It has sure flown by quickly.

Here is this weeks update.  From the design studio of Soma Acharya~ Whims and Fancies.

Hello Sweetie!


What Doctor Who quilt would be complete without a little of River Song's influence?

You can find the pattern here.

Happy Sewing!

Tuesday, November 5, 2013

Doctor Who Along block 13 – Ood


Ah the gentle Ood ~ they have earned their place on this quilt don’t you think?


Here is block 13 in the  Doctor Who along

My Ood has red eyes as he's a bit possessed, but you might prefer a kinder, gentler, version...
Ood

Download the pattern here or get it on Craftsy.
Pattern is rated as intermediate in difficulty.

Additionally, Soma and I have decided to upload all the patterns on each others Craftsy pages, so you can find them all in one place more conveniently (well 2 places actuall). You can find my Craftsy homepage here.  I will be uploading all the patterns to my page in the next few days.

There are lots of great mashups on the flickr page of the blocks people have made so far. Go  check it out! There are going to be a lot of awesome quilts out there! 

Allons-y! 

Tuesday, October 15, 2013

Doctor Who Along Block 12 Gallifrey

PLEASE NOTE – these patterns have been removed are no longer available

How about a visit to the home planet? It's time for Doctor Who Along block 12 ~ Gallifrey.  Home of the time lords.

This block was designed by Soma and you can find the pattern on her blog.
Here is my version of the block.


You can visit the Doctor.Who.Along group on Flickr for lots of inspiration, sewing support and chat.


Happy Sewing!


Tuesday, October 1, 2013

Doctor Who Along block 11 Striped Scarf

In this weeks installment of the Doctor Who Along, we have "4th Doctor" Tom Baker's striped scarf. Remember that scarf? To say it was long would be an understatement. It always seemed to come to the rescue when needed and somehow magically never managed to get caught on anything - or did it? It's been awhile. Tom Baker was the Doctor that started me on the series in the beginning. I was still a kid back then - hard to believe I know. The special effects in those days were laughable at best, but somehow the show had a charm that made you look beyond all the cheese.


So I present to you, the 11th foundation block for the Doctor.Who.Along - the striped scarf. Make it in whatever colors you choose. I chose to stick close to the original colors. Another Constellations fabric print for the background. Perfect I tell you! Thank-you Miss Lizzie House!


Link to Pattern and Instructions here and on Craftsy.

I hope you enjoy sewing it, it's one of the easier blocks in the QAL. The 11th block means we are more than halfway through this QAL!

Allons-y!

Tuesday, September 24, 2013

Doctor Who Along Block 10 ~ Dalek

PLEASE NOTE – these patterns have been removed are no longer available

You love to hate 'em - the Daleks! Arch Nemesis of the Doctor.  From their glorified trash can/toilet plunger beginnings, to the high tech laser beamed killers of today, you can always count on them to show up at just the wrong moment.  Luckily the good Doctor always manages to outwit them.

You can have your very own Dalek up close and personal, minus the laser beams and scary looking spinny things.

This block was designed by Soma and it's fun to piece.  The Doctor Who block you've been waiting for.


You can download the pattern and instructions here.

Don't forget to post your finished block pics in the Flickr pool. 

Happy Sewing! 

Tuesday, July 2, 2013

Who is Badwolf?

Ah yes the endless Badwolf references. We spent a whole season (or more) wondering who Badwolf was? Remember those? Pretty iconic Doctor Who I think.  That's this weeks theme for Block 5 of the Doctor.Who.Along.


Badwolf Doctor.Who.Along Block 5
Yes I know it looks complicated and to be honest, it is one of the toughest blocks in the QAL but if you go slow and do small sections at a time, I know you will get there! This block took me approximately 2 evenings to piece - that's about 6 hours.  So keep that in mind. Take your time and roll with it!

The pattern can be found here and on Craftsy.

I chose a brick print background for my block but since it's directional, it adds another layer of complexity to the piecing, if you are a beginner, stick with a non-directional or even a solid print for your background. Follow my piecing guidelines here for those tricky diagonal seams and all will be well.  A glass of wine might help also :)  After all, it's supposed to be fun, right?!

Don't forget to add your finished block photo to the Flickr Doctor.Who.Along photo pool.

Happy Sewing!  Geronimo!!!


Tuesday, May 21, 2013

Doctor.Who.Along Block 2 ~ Timelord

PLEASE NOTE – these patterns have been removed are no longer available

Welcome back fellow Whovians! I know you are all anxious to find out about the 2nd block, but before I get to that I wanted to say how thrilled Soma and I are about the enthusiasm for our little quilt along. We now have close to 200 members and lots of active participation on the group. So a huge shout-out to all our members - and a big Thank-you! We are so thrilled you could join us!

We have gotten some feedback about the blocks now that we are 2 weeks into the QAL. I wanted to let everyone know that although the first block might've been a little tough for some, many of the blocks will be quite easy to do and suitable for beginning paper-piecers. Soma and I really wanted to challenge you guys! So bear with us. There will be easier blocks, but there will also be some challenging blocks for those of you who feel like you are up for it! With 20 blocks, I think we have something for everyone, so don't worry about having enough blocks to make a quilt even if you don't feel like you can do them all - I don't think that's going to be a problem.

Finally I wanted to throw out some general paper piecing tips which should help a bit. But for those of you who can't wait any longer, here are the Block 2 links:

Block 2 Timelord designed by Soma Acharya

Here is my version of the block
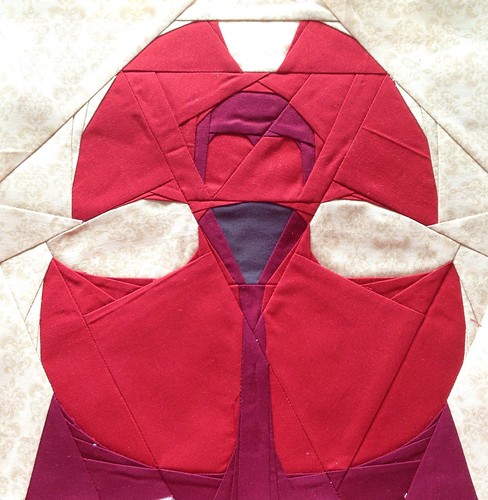
Timelord Block 2 Doctor.Who.Along QAL

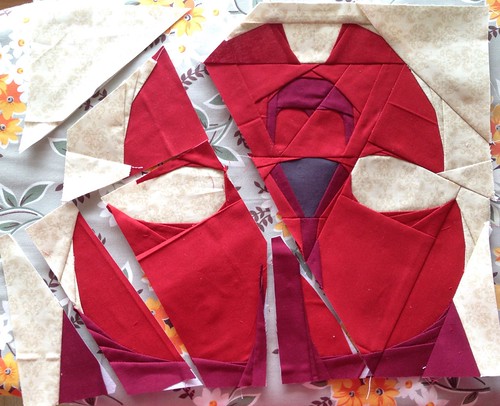
 And here it is not quite assembled so you can see how it goes together: Timelord Block 2 Doctor.Who.Along
Some handy tips for foundation-piecing:

  • Foundation paper: First off I wanted to address the medium you are using to paper piece. Likely you are using printer paper to print your designs - logical of course. However, I strongly encourage you to consider a product designed specifically for foundation piecing. I cannot stress this enough. I know that it can be tough to stitch through 4++ layers of fabric and at least as many layers of paper. Here is what I use exclusively: Perfect Piecing - Transparent Quilt Block Foundation Sheets from June Taylor. I am in no way affiliated with this company, just a happy customer. This stuff is transparent which means that you can see the fabric through it which sure helps when you are trying to place your fabric on the lines. In addition, it's much thinner than printer paper, which means you can stitch through more layers of it with ease and it's more like fabric than paper, so it's easy to punch through. In fact, this stuff is so thin I never even bother to pull it off the back when I'm done, I just leave it on there and it helps to stabilize the block a bit. There are other products that you could also try, such as newsprint foundation paper which is thinner and therefore also easier to stitch through - it's not transparent though. Any of these will help with your construction quite a bit. 
  • Fabric placement: start with a much larger piece of fabric than you think you'll need - at least until you have more experience. That way you'll be sure all your fabric covers the lines when you flip it over. 
  • Seam stacking:  If you feel like there is just too much fabric/paper to sew through, especially on small pieces where a lot of the seam allowance overlaps, just trim the seam allowance back to 1/8".  Be careful not to cut the seam line, but you can certainly trim off more than 1/4" of the excess fabric and all of the paper.
  • Angled seams:   Lastly, here is my handy dandy fabric placement photo tutorial for those pesky angled seams.  
Here's a piece that has a nice angle on it.  (This block is part of the cottage block by Kerry of verykerryberry)
See that piece between J1 and J3?  There's a pretty good angle there and it can sometimes be difficult to line up those pieces once you flip them over.  You don't want to end up short of fabric along the seam allowance when you trim so you end up cutting a huge wad just to avoid that. Right? However, there's a foolproof way to ensure that you have the right fit every time AND not waste fabric.  
Lay the right side of the fabric down on the pattern piece so that it fits over the section you need to cover.  In this case it's J3.  This way you can easily cut a piece of fabric that you know will fit. Now, fold the fabric back, finger pressing along the seam line between J1 and J3.  With me so far?  Now hold that fabric along the fold so it doesn't come undone.  With your other hand, flip over the sewn piece (the piece that has the pattern paper on it).  


 Hold it up to the light so you can see the seam line through the paper.  That seam line is where you will line up the fold line of the fabric you are holding.


Now keep holding that fabric in place and in the light it should look like this.


 Now unfold it.  It should look like this:


Carefully hold the fabric in place so it doesn't shift from where you have placed it, and flip the whole thing over and sew along the seam line on your machine. When it's done it will look like this:

And when you look at the right side, it'll look like this:
When you trim it will fit perfectly over the section you were trying to cover, J3.
Voila!! Works every time!  Give it a shot.

Happy Sewing!


Tuesday, May 7, 2013

Doctor.Who.Along Block 1

Welcome fellow Whovians!! Are you ready to get your Doctor on?  Soma and I are so excited to finally get this quilt-along underway.

Here we go ladies and gents it's time for Block 1.

Block 1 is the iconic Tardis.  Could it be anything else?


This block is all straight-line sewing and while it's not a beginner block, it only differs in that it has a few more pieces.  You do need some basic foundation piecing skills for this and all our blocks.  Instructions are included along with the pattern pieces.

You can download the pattern instructions here or through Craftsy.  Don't forget to add your finished block photo to the Flickr Doctor.Who.Along photo pool.  I can't wait to see what everyone comes up with.

Happy Sewing!  Geronimo!!!


Tuesday, June 26, 2012

4th July Flag Map Mug Rug Pattern


Now there's a tongue twister for you:  Flag Map Mug Rug.  Whoo! :)  I just finished up this fun 4th of July Mug Rug as part of the Scrappy Mug Rug swap with a Red/White and Blue theme.  This one is going to Cherry in Louisiana.   It's a foundation pieced 5x7" block that can be turned into a mug rug or used for something else.

Want to make one of your own?  You can download it here and the piecing guide can be found here.

There are a couple of glitches still with the software I use to make these patterns,  so you'll have to glue/tape pieces G1 to H1 together before you sew,  same goes to C/D, P/O and also sections A1/A2 can be attached to B1/B2 before sewing.  For some reason I can't get the program to leave those attached.  I'm sure it's user error, but you can still use the pattern as is.  

The piecing guide is shown here:


Sewing sections:
Sew AB, to  CD
Sew E
Sew F to,G/H to I to J-to K
Sew FGHIJK --to ABCD

Sew M to  N to L  
MNL to AB...K  Set aside

Sew OP to Q to R to S.  Set aside
Sew Xto W to V to U to T
Attach TUVWX to PQRS then attach Y
Attach the top and bottom halves of the map and you are done!

Now go whip one up and when you're done you can put your tall frosty glass of lemonade (or other beverage) on it!  I hope you have a Happy 4th with friends or family and lots of good BBQ!  Happy Sewing!


Friday, May 25, 2012

Oh Snap block by Becky

As you know, I recently participated in the Sew Out Loud Quilt-along and there were quite a few  submissions for the twelfth and final block.  I thought some of those blocks were fantastic and deserved to be made available for other people to sew.  So I contacted fellow Oregonian, Becky of Solar Threads and offered to digitize her 'Oh Snap' design for her so you all could sew it as well. Ok I'll confess I wanted to sew it also. ;)

Here is her fabulous block design:


The final design will yield a block that is 12.5" square.  The pattern pieces for this block can be found here

The piecing guide is here.

Please NOTE that there is an error on the pattern pieces pdf.  Block H1 is incorrectly labeled and should be labeled H5.  If you assume there is no H1 and proceed from H2 you should be fine.  Also the cutting guidelines for some of the pieces seem to be wonkily off. Just add 1/4" seam allowance around each section when you are finished piecing it and you should be fine.  EQ7 is glitchy for me sometimes when running on the Mac through the virtual desktop.  I'm still working on this problem.

Prepare the sections in alphabetical order.  Starting with section A.
Make section B,  and the make C and attach them to each other - then attach that section to A. Set aside.
Make section D then E and attach them to each other.  Set aside.
Make F and then G and attach. Make H, then attach to FG.
Make I, then make J, then make K and attach J ->I ->K.  Then attach this whole section to HFG.
Make L then make M and attach to each other.  "SNAP!" is made.
Attach section N to bottom of word SNAP. Then attach section O to top of SNAP. Then attach "OH" section to top of SNAP.  Then attach sections ABC above OH SNAP words as shown in piecing diagram.
Then attach pieces P1 and Q1 and you are done!

Awesome block Becky! I can't wait to sew it up myself.  If any of you sew it up, please add it to the Sew Out Loud flickr pool we'ld all love to see it!


Happy Sewing!


Sunday, May 6, 2012

Stitch block instructions


See out Loud block 12
 The Sew Out Loud quilt along has been through 11 amazing weeks and 11 equally amazing blocks.  I am only about halfway through sewing up the blocks  myself but I continue to be amazed by the creativity and talent of all the designers.  Every single block is so original.

As you might know, part of the QAL was to select a 12th block from among the entries submitted by participants.  The winning entry was chosen by none other than Suzuko Koseki herself.  Quite an honor.  I'm thrilled to say that my block was chosen as the winning block.  I can't tell you how honored I am to be included.  Still kind of in shock over here.

I also wanted to say thank-you to all the designers for hosting the QAL and especially to Joanna and Juliana who organized the whole event.  It truly was the most exciting QAL I've been part of and the ladies that participated were a blast.  If you would like more info click here:


SOL QAL


So with that, here are the instructions for sewing the block:

Go here to see the block pieces.  They are formatted to print on US 8.5x11 paper and include seam allowances.  Set your printer to print at full scale (100%).  The finished block should be 12.5".  Thanks to Joanna for help, she test printed these on A10 paper as well and they came out at the correct scale.  So I think all our European friends should have no problem printing these.

Go here to see instructions for piecing this block. Instructions are also posted in this blog post with some pictures.

Instructions for piecing of Stitch Block
Section layout ~


Foundation piecing of Stitch block.  
All Pattern pieces include ¼” seam allowance. Remember to trim up your sections to ¼” prior to attaching to the next section.  Some pieces need to printed over 2 pages. You will have to attach the pattern sections together using the guidelines prior to sewing (a glue stick works well).  All pages should be printed on a standard 8.5x11” (US/Canada) paper or foundation paper product.  


Needle ~
Stitch section A,
Stitch section B, Sew A to B
Stitch section C, Sew A to C
Sew D to B, Attach section E to C, Needle segment complete.

Attach section F to Needle section.  Attach section G to F and Needle section.  Set aside.


Spool ~
Sew section H.  Sew section M.  Sew section N.  Attach M to N. Sew section S. Attach section S to H and M/N.  Set aside.
Sew section I.  Sew section R.  Sew section O.  Attach R to I and then to O.  Set aside.
Sew section J.  Sew section K.  Sew section L.  Sew section P.  Sew section Q.  Attach L to J and then to K.  Attach Q to LJK and then to P.  


Set aside.  
Attach T to SHMN.  Then attach this whole section to RIO.  Then attach this whole section to QLJKP.  Spool segment complete.  


Sew this half of the block to the previous side (needle segment).  Block should measure 12.5”.  Trim up if necessary. Block is complete. 

With a chalk pencil, write the word STITCH and draw a thread line in a looping arc through the eye of the needle and over to the word “Stitch”.  


I like to trace a printed out word since my handwriting isn't the neatest. I tape the block to the window to help see through the block to the paper underneath.  Remember to have the thread going above  the eye of the needle on one side and and below the eye on the other side so that it looks realistic.  Use cotton embroidery floss to  stitch over your drawn lines.  You are done! Enjoy!


 Please email me or post a comment if you have any questions about the block piecing.
 Happy Sewing!